That little chip in your windshield is like a ticking clock. It might seem harmless now, but temperature changes and road vibrations are constantly putting stress on it. Blasting the AC on a hot day or hitting the defroster on a cold morning can be all it takes to make that crack run across your entire windshield. Acting fast is your best defense against a much bigger problem. This guide provides the clear, actionable steps you need to address the damage right away. We’ll give you the knowledge to confidently fix a small crack in your windshield, stopping it in its tracks and saving you from an expensive replacement down the line.
Key Takeaways
- Act on small chips before they crack: Ignoring a minor chip is a gamble. Everyday driving stress and temperature shifts can turn it into an unfixable crack, leading to a full windshield replacement. A quick fix saves you from a much bigger expense later.
- A successful DIY repair requires the right approach: If you’re fixing a small chip yourself, your success depends on using a quality repair kit and working in the right conditions. A clean surface, proper resin application, and curing in direct sunlight are non-negotiable for a strong, lasting bond.
- Prioritize safety by knowing when to call a pro: DIY kits are not for every situation. If the damage is larger than a quarter, in your direct line of sight, or reaches the edge of the windshield, it’s time to call an expert. A professional repair ensures your windshield’s structural integrity isn’t compromised.
What’s That Crack in Your Windshield?
That sharp thwack of a rock hitting your windshield is a sound every driver dreads. You scan the glass and there it is—a tiny new chip. While it’s tempting to ignore it, that little blemish can quickly become a big problem. Understanding the type of damage is the first step. Acting fast helps you avoid a more costly replacement, and knowing what you’re dealing with will help you decide if a DIY fix is the right move or if it’s time to call in a professional.
From Bullseyes to Star Breaks: Common Damage Types
That little mark on your glass has a name. Most windshield damage falls into a few categories. A bullseye is a circular chip, often with a dark impact point. A star break has small cracks radiating out from the center. You might also see a combination break, which is a mix of both. Then there are simple cracks, which are short lines that can appear without a clear impact point, sometimes due to stress or temperature changes. Each of these flaws can compromise your windshield’s strength and has a nasty habit of growing larger.
Why You Shouldn’t Wait to Fix It
Putting off a small repair is an expensive mistake. A tiny chip is a weak point in your windshield. Everyday driving—hitting a pothole or even road vibrations—can cause that chip to spread into a long, unfixable crack. Temperature changes are another major culprit; blasting the AC on a hot day can force a crack to run. A quick windshield chip repair is simple and affordable, while waiting almost guarantees you’ll be paying for a full windshield replacement later.
Can You Really Fix It Yourself?
The good news is you can often fix minor windshield damage yourself. DIY repair kits are designed for small jobs and can be effective if used correctly. As a rule, you can tackle a chip smaller than a quarter or a crack shorter than three inches. A proper repair can stop the damage from spreading and last for years. However, be realistic. If the damage is in your line of sight, larger than recommended, or has multiple cracks, it’s best to leave it to a professional. When in doubt, it’s smart to get a quote from an expert.
Choosing the Right DIY Repair Kit
If you’ve decided to tackle that small chip yourself, your success hinges on the quality of your tools. Walking into an auto parts store can be overwhelming, with shelves of options all promising a perfect fix. The truth is, not all DIY kits are created equal. A good kit will have clear instructions and high-quality materials that create a strong, lasting bond. A cheap one might leave you with a cloudy spot or, worse, fail to stop the crack from spreading.
Think of it this way: you’re performing a small-scale surgical procedure on your car’s glass. You want the best instruments you can get. Choosing the right kit means looking for one that matches the specific type of damage you have, contains fresh materials, and has a good reputation. Taking a few extra minutes to research your options can be the difference between a nearly invisible repair and a costly mistake that requires a professional to fix later.
What Should Be in Your Kit?
Before you buy, take a close look at the packaging. The most important thing is to find a kit designed for the size and type of your damage—a small bullseye needs a different approach than a short crack. A complete kit should include an applicator or bridge that holds the resin injector steady over the chip, the repair resin itself, and curing strips. Also, check the expiration date on the box. The epoxy resin works best when it’s fresh, ideally less than six months old. An expired kit won’t create a strong bond, and your repair is more likely to fail.
A Few Top-Rated Kits to Consider
You don’t have to guess which brands are reliable. Some names pop up again and again in reviews for a reason. Brands like Rain-X, 3M, and Permatex are often recommended by car enthusiasts and DIYers for their effectiveness and easy-to-follow instructions. These well-reviewed kits have a track record of success for small repairs. While one might be a top pick for its injector design, another might be praised for its fast-curing resin. Reading a few customer reviews can give you a feel for which one might be the best fit for your specific needs and comfort level.
A Quick Guide to Repair Resins
The star of any repair kit is the resin. This isn’t just any glue; it’s a specially formulated liquid polymer that seeps into the nooks and crannies of the chip. When cured properly, usually with UV light from the sun, it hardens and bonds with the glass. This process does two things: it restores the structural integrity of the windshield and makes the damage much less noticeable. A quality resin will cure to be incredibly strong—sometimes even stronger than the original glass—ensuring the chip doesn’t start to spread again the next time you hit a pothole.
Balancing Price and Quality
It can be tempting to grab the cheapest kit on the shelf, but this is one area where you get what you pay for. A low-quality kit might come with a flimsy applicator that’s hard to use or a weak resin that doesn’t cure clearly. Investing a few extra dollars in a reputable kit is a smart move. The goal of a DIY repair is to stop the damage from getting worse and save you the expense of a full windshield replacement. A good kit makes that possible, while a bad one just delays the inevitable and wastes your time and money.
Your Step-by-Step Guide to Fixing a Windshield Chip
So, you’ve got your DIY kit and you’re ready to tackle that annoying chip. Great! Fixing a small chip yourself can be a satisfying project, and it’s definitely better than letting it spread into a full-blown crack that requires a replacement. The key is to work carefully, stay patient, and follow the instructions to the letter. This guide will walk you through the general process, but always remember to defer to the specific directions that came with your chosen kit. Think of this as your friendly overview to make sure you’re on the right track from start to finish.
Before you begin, find a good spot to work—ideally, a shaded area away from direct sunlight and rain, as temperature and moisture can affect the repair. Gather everything you need so it’s within arm’s reach. If at any point you feel like the damage is more than you can handle, don’t hesitate to pause. Professional windshield chip repairs are fast, affordable, and ensure the job is done right. For now, let’s roll up our sleeves and get that windshield looking clear again. You’ve got this.
Step 1: Get Prepped and Stay Safe
First things first: safety. The resin in your kit can be irritating, and you’re working with glass, so it’s smart to take a few precautions. Before you even open the kit, put on a pair of safety glasses and some disposable gloves. This will protect your eyes from any splashes and keep the sticky resin off your hands. It’s also a good idea to work in a well-ventilated space, like an open garage or outdoors in the shade. Lay out all the components of your kit on a clean cloth so you can see everything you have and grab what you need without fumbling around.
Step 2: Clean the Damaged Area
A successful repair starts with a perfectly clean surface. Any dirt, dust, or moisture trapped in the chip will prevent the resin from bonding correctly and can make the final repair look cloudy. Use the alcohol prep pad from your kit or a little rubbing alcohol on a clean microfiber cloth to gently wipe the area around the chip. Be careful not to spray any cleaner directly into the damage itself. Use a pin or the small probe from your kit to carefully pick out any tiny, loose glass fragments from the impact point. Make sure the area is completely dry before you move on.
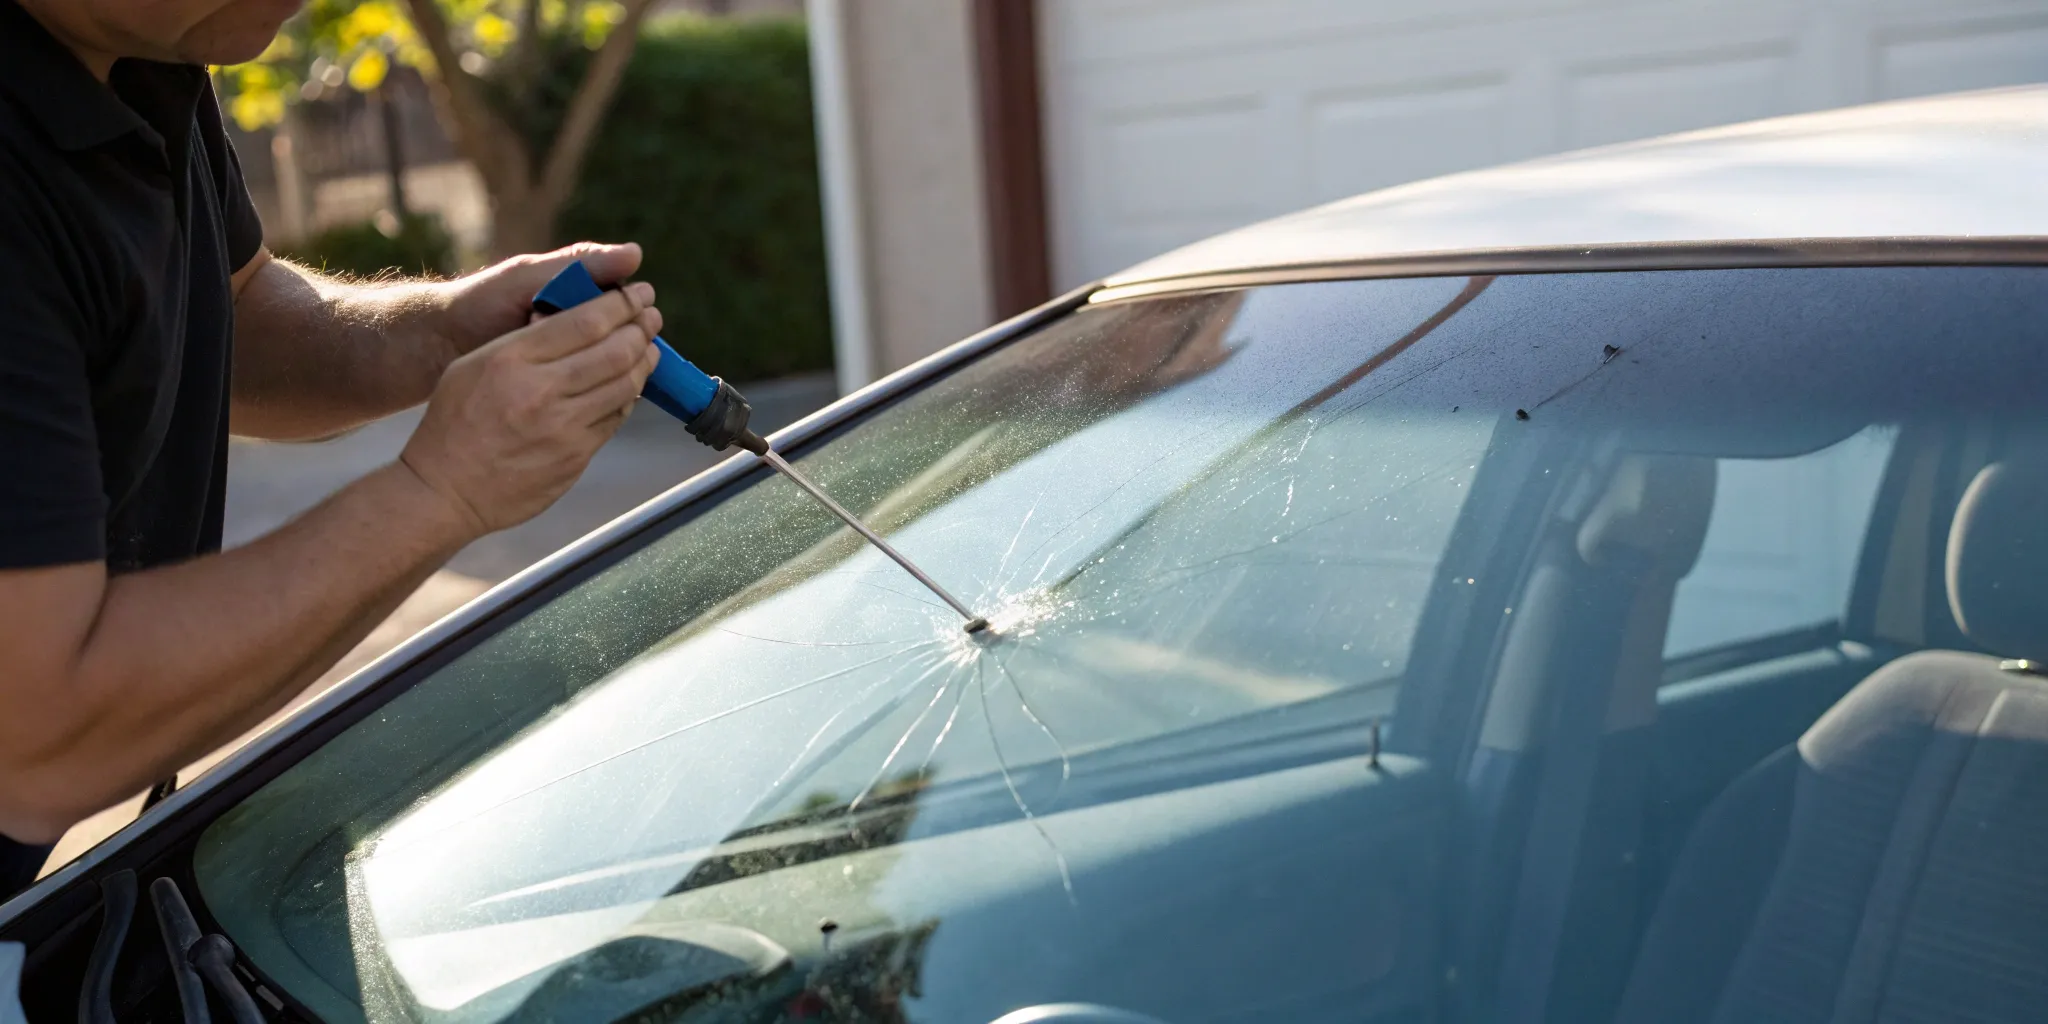
Step 3: Apply the Repair Resin
This is where the magic happens. Your kit will have an applicator or pedestal that you’ll center over the chip, using suction cups to hold it firmly against the glass. Once it’s secure, it’s time to add the resin. Carefully squeeze the recommended number of drops into the pedestal. Next, you’ll use the included syringe to alternate between pushing and pulling the plunger. Pushing forces the resin deep into the chip, while pulling creates a vacuum that sucks out any trapped air bubbles. This step is crucial for a clear, strong repair, so take your time and follow your kit’s instructions precisely.
Step 4: Cure and Finish the Repair
Once you’ve worked the resin into the chip and removed the air bubbles, it’s time to let it harden, or cure. Remove the applicator and immediately place one of the clear curing strips from your kit over the wet resin. Gently smooth it out to remove any new air bubbles. Now, you’ll need some UV light. Move your car into direct sunlight for the amount of time specified in your kit’s instructions—usually around 15 to 20 minutes. After it has fully cured, use the provided razor blade, held at a 45-degree angle, to carefully scrape off the curing strip and any excess, hardened resin until the surface is smooth.
Step 5: Take Care of Your Windshield Post-Repair
Congratulations, you did it! The chip should now be nearly invisible and, more importantly, stable. While the repair is strong, it’s good practice to be gentle for the next day or so—avoid power car washes or extreme temperature changes if you can. Remember, fixing a chip promptly is the best way to prevent it from spreading and forcing a full windshield replacement. Keep an eye on the repaired spot over the next few weeks. If you notice the crack starting to spread, it’s time to call in a professional to assess the situation and ensure your windshield is safe.
Don’t Make These Common DIY Mistakes
Going the DIY route can feel empowering, but a simple windshield repair can quickly go wrong if you’re not careful. Even with the best kit, a few common missteps can turn a small chip into a bigger problem, leading to a full replacement you were trying to avoid. Think of it like baking—if you skip a step or get the temperature wrong, you won’t get the result you want. To help you get a near-invisible and lasting fix, let’s walk through the mistakes you’ll want to sidestep. By avoiding these common errors, you give your repair the best possible chance of success and keep your windshield strong and clear.
Skipping the Prep Work
It’s tempting to jump right into the main event, but proper prep work is the foundation of a successful repair. Before you even think about applying the resin, the area around the chip needs to be spotless. Any lingering dirt, dust, or moisture can get trapped under the resin, weakening the bond and leaving you with a cloudy, ineffective fix. Use a clean cloth with a bit of rubbing alcohol to wipe down the glass around the damage. Be careful not to spray glass cleaner or any other liquid directly into the chip itself, as this can push debris deeper inside. A clean, dry surface ensures the resin can fully penetrate the crack and create a solid, lasting seal for professional-grade windshield chip repairs.
Applying the Resin Incorrectly
How you apply the resin is just as important as the resin itself. Most kits come with a syringe and a pedestal applicator for a reason: they help you create a vacuum to force the resin deep into every tiny crevice of the crack. After placing the pedestal over the chip, pour in the resin until it’s full. Then, use the syringe to push the resin down before pulling the plunger back up. This push-pull action removes air bubbles and ensures the crack is completely filled. If you don’t use enough resin or fail to create a proper vacuum, you’ll end up with air pockets that compromise the structural integrity of the repair and remain visible.
Working in the Wrong Conditions
Your environment plays a huge role in how well the repair resin cures. Most DIY kits use a resin that hardens with exposure to UV light, which means you need the sun on your side. For the best results, plan to do your repair on a warm, sunny day. The ideal temperature range is typically between 50 and 75 degrees Fahrenheit. Trying to fix a chip in a shady garage, on a cold day, or during an overcast afternoon will prevent the resin from curing properly. The resin needs that direct UV exposure to harden into a durable, transparent bond. Without the right conditions, you’ll be left with a tacky, weak patch that does little to stop the crack from spreading.
Rushing the Curing Process
Patience is a virtue, especially when it comes to letting the resin cure. Every repair kit has specific instructions for how long the resin needs to harden, and it’s critical to follow them. After applying the resin and placing the curing strip on top, step away and let the sun do its work. Resisting the urge to poke at it or peel the strip off early is key. If you remove the strip too soon, the resin won’t be fully hardened, and the repair will fail. A rushed job is a failed job, and it could mean the difference between a simple fix and needing more extensive auto glass services.
Know When to Call a Professional
DIY kits are fantastic for minor fixes, but they definitely have their limits. Knowing when to step back and call for backup is just as important as knowing how to use a repair kit. Some types of damage simply require professional tools, materials, and expertise to ensure your windshield is truly safe and the repair will last. Pushing a DIY fix beyond its capabilities can lead to a failed repair that spreads, a bigger crack, or even the need for a full replacement you were trying to avoid. It’s about making the smart call for your car’s safety and your own peace of mind.
Let’s walk through the clear signs that it’s time to put down the resin and pick up the phone. This isn’t about admitting defeat; it’s about recognizing when a job calls for a specialist. Trusting a professional for the right kind of damage saves you time, stress, and ensures the job is done correctly. A proper repair maintains the structural integrity of your vehicle, which is crucial for safety. We’ll cover the specific situations where a professional touch is non-negotiable.
Is the Damage Too Big or in Your Line of Sight?
Size and location are the two biggest factors in the DIY vs. pro debate. As a general rule, you can usually fix chips smaller than a quarter or cracks shorter than three inches with a DIY kit. If the damage is larger than that, it’s time for a professional assessment. A larger crack can compromise the structural integrity of the glass, and a DIY patch just won’t be strong enough. Equally important is the location. If the chip or crack is directly in your line of sight, most technicians will recommend a full windshield replacement. That’s because even the best repair can leave a slight distortion, which can be a dangerous distraction while driving.
Dealing with Multiple Cracks
One small chip might seem manageable, but what about two, three, or more? If your windshield has multiple points of damage, it’s best to consult a professional. Each chip and crack creates a weak point in the glass. When you have several, the overall strength of your windshield is significantly reduced. Think of it like a chain—it’s only as strong as its weakest link. Multiple damages can seriously compromise the structural integrity of the windshield, which is a critical component of your vehicle’s safety system. A professional can assess the overall condition of the glass and determine if individual chip repairs are sufficient or if a replacement is the safer option.
Why Edge Damage Is a Red Flag
A crack that starts at or extends to the edge of your windshield is a major red flag. These cracks are particularly problematic because they can spread very quickly and threaten the seal between the glass and the vehicle’s frame. The edges of the windshield experience more stress from vehicle vibrations and temperature fluctuations, which encourages cracks to grow. A compromised edge can also affect the performance of your airbags, as the windshield provides crucial support when they deploy. Due to this high risk, damage near the edge almost always requires professional attention to prevent it from becoming a much bigger and more dangerous problem.
Letting Your Insurance Handle It
Before you even buy a DIY kit, it’s worth checking your auto insurance policy. Many comprehensive plans include “glass coverage” that helps pay for these fixes, often with a low or even zero deductible. If you get the crack repaired by a professional shop, your insurance will likely cover it, making it a hassle-free and cost-effective option. At Winaffix, we can help you with the entire auto glass claims process, coordinating with your provider to make it as smooth as possible. Why spend your own time and money on a DIY repair when a professional fix might not cost you anything out of pocket?
Keep Your Windshield Strong Post-Repair
You’ve successfully repaired that annoying chip—great job! But the work doesn’t stop there. Taking care of your windshield after a DIY fix is just as important as the repair itself. A little bit of ongoing attention will help ensure the repair holds strong and keeps your view crystal clear. Think of it as aftercare for your car’s most important window. By following a few simple practices, you can protect your handiwork and prevent small issues from turning into big, expensive problems down the road.
Inspect Your Handiwork Regularly
Make it a habit to check on your repair every so often, like when you’re washing your car or filling up on gas. Look closely at the area you fixed. Do you see any new lines spreading from the original spot? Is the resin turning cloudy or yellow? A solid repair should be nearly invisible and stable. Catching any changes early is key. Remember, fixing small chips promptly can save you from needing a full windshield replacement later. If you notice the damage starting to spread or the repair doesn’t look right, it’s a sign that the DIY fix may not be holding up against the elements and daily driving stress.
Tips to Prevent Future Damage
Now that your windshield is back in good shape, let’s keep it that way. Future damage is often avoidable with a few adjustments to your driving habits. One of the biggest culprits is road debris. Avoid tailgating large trucks, as their tires can kick up rocks and gravel that cause chips. It’s also wise to be mindful of where you park. Parking under trees might offer shade, but it also risks damage from falling branches, acorns, or sap. Small impacts and vibrations from driving over potholes can also stress the glass, so try to avoid them when you can. These simple precautions can make a huge difference in maintaining your windshield’s integrity.
Protect Your Glass from Extreme Temperatures
Sudden and extreme temperature changes are your windshield’s worst enemy, especially after a repair. The glass and the repair resin expand and contract at different rates, which can weaken the bond and cause the crack to spread. Avoid blasting the air conditioning on a sweltering day or using the hot defroster on an icy morning. Let the cabin temperature adjust gradually. Whenever possible, park in a garage or shaded area to shield your car from direct sunlight or freezing conditions. The resin used in windshield chip repairs cures best in moderate weather, and protecting it from temperature shocks will help it last.
Spotting the Signs of a Failed Repair
Sometimes, despite your best efforts, a DIY repair just doesn’t hold. It’s important to know when to call it quits and bring in a professional. If you see the original crack starting to spread, or if the repaired area becomes discolored or hazy, the fix has likely failed. Another tell-tale sign is if you can still feel the chip with your fingernail after the resin has cured. A failed repair isn’t just a cosmetic issue; it can compromise the structural integrity of your windshield. If you notice any of these signs, it’s time to get a quote from a professional service. We can assess the damage and determine if a professional repair or a full replacement is the safest option for you.
Your Windshield Is a Key Safety Feature
It’s easy to think of your windshield as just a window, a simple barrier against wind and rain. But it’s so much more than that. Your windshield is an engineered safety component, playing a critical role in your vehicle’s structural integrity and the proper function of its safety systems. When it’s damaged, even by a small chip, the safety of everyone in the car is compromised. Ignoring that little bit of damage might seem harmless, but it can lead to bigger problems for your car and your wallet. Understanding the vital role your windshield plays is the first step toward keeping it in top condition and ensuring you stay safe on the road.
How a Chip Affects Your Car’s Structure
That tiny chip from a stray rock might not look like much, but it’s a weak spot in a crucial piece of your car’s support system. Your windshield provides a significant amount of strength to the vehicle’s frame, helping to prevent the roof from collapsing in a rollover accident. A chip or crack compromises this structural integrity. Over time, vibrations from the road and changes in temperature cause the glass to expand and contract, which can make small chips and cracks grow bigger. What starts as a quick fix can easily spread across the glass, eventually requiring a full windshield replacement. Addressing damage early is the best way to maintain your car’s structural safety.
Why Clear Visibility Is Non-Negotiable
Your ability to see the road clearly is fundamental to safe driving. Any crack or chip in your line of sight can create a dangerous distraction, obstruct your view of pedestrians or other vehicles, and even distort your perception of the road ahead. At night, damage can cause light from oncoming headlights to scatter, creating a glare that makes it difficult to see. Beyond the immediate safety risks, a cracked windshield can also cause your car to fail its state safety inspection. For modern vehicles, clear visibility is also essential for the advanced driver-assistance systems (ADAS) that rely on cameras mounted behind the windshield to function correctly.
Best Practices for Long-Term Windshield Health
The best way to handle windshield damage is to prevent it from happening in the first place. While you can’t dodge every rock on the highway, you can take simple steps to protect your glass. Maintain a safe following distance from large trucks and vehicles on gravel roads to avoid flying debris. Be mindful of extreme temperature changes—never pour hot water on an icy windshield, as the sudden change can cause it to crack. If you do get a chip, the most important thing is to get it repaired as soon as you see it. A timely windshield chip repair will stop the damage from spreading and keep your original factory-installed windshield intact.
When to Get a Professional Assessment
While DIY kits can handle tiny blemishes, they have their limits. As a general rule, you should seek professional help for chips larger than a quarter or cracks longer than three inches. Damage that is directly in the driver’s line of sight or that reaches the edge of the windshield also requires an expert opinion. A professional technician can assess the damage and determine if a repair is possible or if a replacement is the safer option. Don’t wait for the damage to get worse. If you’re unsure about the severity of a chip or crack, it’s always best to get a professional assessment to ensure the job is done right.
Related Articles
- How to Repair a Car Windshield Chip: DIY vs. Pro
- Glass Chip Repair Windshield: DIY or Call a Pro?
- Windshield Chip Repair: Your Complete Guide
Frequently Asked Questions
How long does a DIY windshield repair take from start to finish? From cleaning the chip to scraping off the excess resin, you should set aside about an hour. The hands-on part, like cleaning the glass and applying the resin, usually takes around 20 to 30 minutes. The rest of the time is for the resin to cure, which just involves letting your car sit in direct sunlight. While the sun does the heavy lifting, it’s important not to rush this step.
Will the chip be completely invisible after I repair it? The main goal of a DIY repair is to restore the structural strength of the windshield and stop the damage from spreading. While a successful repair will make the chip much less noticeable, it likely won’t disappear completely. You might still see a faint blemish where the damage was. For a result that’s as close to invisible as possible, a professional windshield chip repair is usually your best bet.
What happens if I make a mistake during the repair? Unfortunately, a DIY windshield repair is a one-shot deal. Once the resin has been applied and cured, it can’t be removed and redone. If you trap air bubbles, don’t use enough resin, or let it cure improperly, the mistake is permanent and can’t be fixed. This is why it’s so important to read the instructions carefully and work in the right conditions. If you’re not feeling confident, it’s always smarter to call a professional.
Is it safe to take my car through a car wash after a DIY repair? You should wait at least 24 hours before taking your car through a power car wash. The resin needs time to fully harden and bond with the glass. The high-pressure water jets in an automatic car wash can put stress on the newly repaired area and potentially weaken the bond. It’s best to give it a full day to ensure your hard work lasts.
Should I even bother with a DIY kit if my insurance might cover a professional repair? This is a great question, and it’s always smart to check your insurance policy first. Many comprehensive auto insurance plans cover the full cost of a professional windshield repair with no deductible. This means you could get the chip fixed by an expert for free. We can even help you with the auto glass claims process to make it simple. A quick phone call to your insurance agent can save you time, effort, and the cost of a kit.