
When your power window stops working, your first thought might be of a costly trip to the dealership. But what if you could handle it yourself? A Hyundai Sonata power window repair is a surprisingly manageable project for a determined DIYer. It’s a great way to save a significant amount of money on labor costs and gain the satisfaction of fixing your own car. This comprehensive guide is designed to empower you with the knowledge you need. We’ll cover how to pinpoint the exact problem, list the essential tools and parts, and provide a clear, step-by-step walkthrough of the entire replacement process, so you can get that window rolling smoothly again.
Key Takeaways
- Listen for clues and check the basics first: Before assuming a major repair is needed, check the fuse and listen for specific noises. Grinding sounds usually point to the regulator, while a faint click often means the motor is the problem.
- Understand the full cost of repair: A DIY fix saves on labor but requires buying the right parts and tools. A professional service provides a guaranteed repair, saving you time and preventing costly mistakes.
- Simple maintenance prevents bigger problems: Regularly cleaning your window tracks and checking the rubber seals for damage reduces strain on the motor and protects internal components, helping you avoid another repair down the road.
What’s Wrong With Your Hyundai Sonata’s Power Window?
That moment when you press the power window button and nothing happens—or worse, you hear a terrible grinding sound—is incredibly frustrating. A stuck window can ruin your day, whether it’s trapping heat inside your car or leaving you exposed to the elements. The good news is that figuring out the cause is usually straightforward. The problem typically comes down to a few key components: the switch, the motor, or the window regulator. Let’s walk through how the system works and what signs to look for so you can pinpoint the issue.
How Power Windows Work
At its core, your Hyundai Sonata’s power window system is pretty simple. When you press the switch, it sends an electrical signal to a small motor inside the door panel. This motor then powers the window regulator, which is the mechanical part that does the heavy lifting. Think of the regulator as a set of arms or a cable system that guides the window glass up and down along its track. If any part of this chain—the switch, the motor, or the regulator—fails, your window will stop working correctly. Understanding this basic process makes it much easier to diagnose what’s gone wrong.
Key Components to Know
The window regulator is the most common point of failure in a power window system. Most modern cars, including your Sonata, use a “cable-type” regulator. This design uses a cable and pulley system to move the window, which is lighter and more compact than older designs. The alternative is the “scissor-type” regulator, which uses a set of crossed metal arms and is typically found in older vehicles. While effective, cable-type regulators have plastic parts that can become brittle and break over time, or the cable itself can snap, causing the window to fail suddenly.
Signs Your Power Window is Failing
Your car will usually give you a few warning signs before the window gives out completely. If you notice any of these symptoms, it’s a good idea to get it checked out.
- Strange Noises: Grinding, clicking, or chattering sounds when you use the switch often point to a problem with the regulator, like stripped gears or a broken cable.
- Slow or Uneven Movement: If the window struggles to go up or down or seems to move crookedly in its track, the regulator is likely failing.
- The Window Drops: A window that suddenly falls into the door is a classic sign of a completely broken regulator.
- No Response: If you press the button and hear a faint click but the window doesn’t move, the motor might be the issue. If you hear nothing at all, it could be a faulty switch or a blown fuse.
Many of these issues trace back to the regulator, which is why professional car window regulator repairs are such a common service.
How to Pinpoint the Problem
When your Hyundai Sonata’s power window stops working, it feels like a major headache. But before you assume the worst, you can play detective and narrow down the cause with a few simple checks. Running through these steps can help you figure out if you’re dealing with a quick fix or something that needs a professional touch. Most of the time, the issue comes down to one of a few common culprits, from a simple blown fuse to a worn-out motor. Identifying the right one is the first step toward getting your window rolling smoothly again.
This process doesn’t require you to be a master mechanic; it’s more about observing and listening to what your car is telling you. By systematically checking each component, you can save yourself time, money, and the frustration of guessing. Think of it as a process of elimination that starts with the easiest and cheapest potential fixes first. If you’ve tried these diagnostic steps and are still feeling stuck, don’t hesitate to let a professional take a look. Our team can quickly pinpoint the issue and handle any necessary car window regulator repairs to get you back on the road with our convenient same-day service.
Check the Fuses First
Before you start taking the door apart, always start with the simplest solution: the fuse box. Your car’s fuses are designed to protect its electrical systems, and a blown fuse is a common reason for a power window to suddenly stop working. You can find the fuse box location in your Sonata’s owner’s manual. While replacing a blown fuse is an easy fix, it’s important to remember that fuses blow for a reason. If the new fuse blows again shortly after, it signals a deeper electrical problem that needs a closer look.
Test the Window Switch
The window switch on your door is something you use all the time, so it’s no surprise that it can wear out. If only one window is failing to respond, the switch is a likely suspect. Try operating the window from both the driver’s side master control and the switch on the affected door. Pay attention to how it feels and sounds. Does it feel loose or mushy? Do you hear a faint click when you press it? If the switch feels unresponsive or different from the others, it might be faulty and unable to send the signal to the window motor.
Inspect the Motor and Regulator
If the fuse and switch seem fine, the problem likely lies deeper inside the door panel with the window motor or regulator. The motor provides the power, while the regulator is the mechanism that physically lifts and lowers the glass. A failing motor might make a whirring or clicking sound when you press the switch, but the window won’t move. On the other hand, a bad regulator often causes loud grinding or popping noises. You might also notice the window moving very slowly, crookedly, or dropping suddenly into the door.
Listen for Telltale Sounds
Your ears are one of your best diagnostic tools. Turn off the radio, roll up your other windows, and listen carefully as you press the window switch. A soft clicking sound often points to a motor that’s receiving power but is unable to move. Loud, unpleasant grinding, crunching, or chattering sounds almost always indicate a problem with the window regulator—often a stripped gear or a snapped cable. Identifying these sounds can help you or your mechanic understand exactly which part has failed without even removing the door panel.
Examine the Window Tracks for Blockages
Sometimes, the problem isn’t electrical or mechanical at all, but simply something getting in the way. Over time, the rubber tracks that guide your window can collect dirt, leaves, and other debris. In colder climates, ice can also build up and block the window’s path. If your window moves a little and then stops, or seems to be struggling, carefully inspect the tracks. You can often see obstructions by looking down into the top of the door panel where the glass retracts. Cleaning the tracks can sometimes be all it takes to solve the problem.
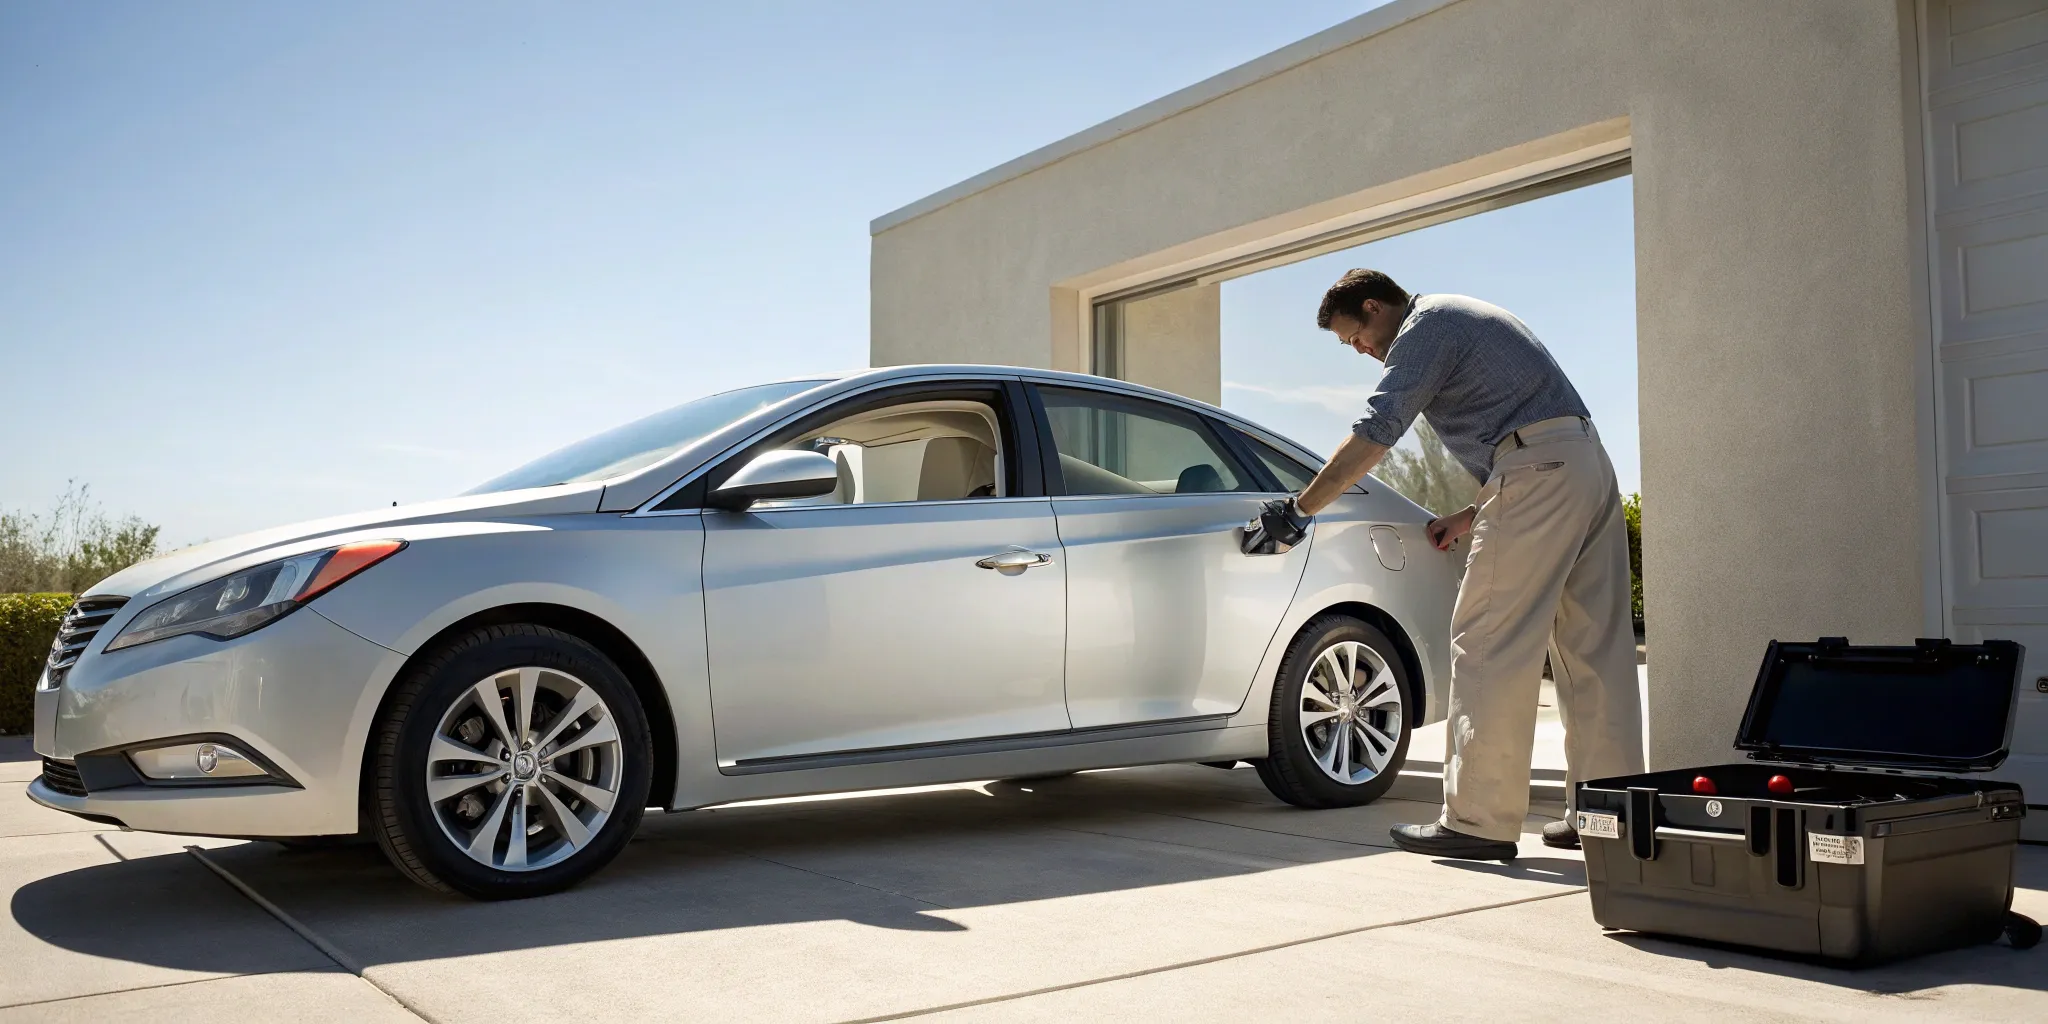
Gather Your Tools and Parts
Alright, you’ve diagnosed the problem, and you’re ready to get your hands dirty. The key to a smooth repair is having everything you need within arm’s reach before you start. Think of it as your pre-flight check. Taking a few minutes to gather your tools and parts now will save you from frustrating mid-project runs to the auto parts store. Let’s walk through exactly what you’ll need to get your Sonata’s window working like new again.
Your Toolbox Checklist
Before you even think about touching the door panel, let’s make sure your workspace is set up for success. You don’t need a professional mechanic’s entire setup, but a few specific tools are essential for this job. Having them laid out and ready to go will make the whole process feel much more manageable. Here’s a quick rundown of what to grab from your garage:
- A ratchet with a 10-millimeter socket
- A Phillips head screwdriver
- A flathead screwdriver (for gently prying off panels)
- The new window regulator and motor assembly (double-check that it’s the correct part for your Sonata’s model year!)
Essential Safety Gear
Working on cars always comes with a few safety rules, and this repair is no exception. Your safety is the top priority, so don’t skip this step. The most important thing to be aware of is the side-impact airbag located inside the door panel. You need to be extremely careful to avoid accidentally deploying it. Beyond that, some basic protective gear will keep you safe from scrapes and scratches. Always wear a pair of sturdy gloves to protect your hands and consider safety glasses to shield your eyes from any dust or small debris that might come loose.
Finding the Right Replacement Parts
Now, let’s talk about the main event: the new window regulator. This is the part that does the heavy lifting, and it’s crucial to get the right one for your specific Hyundai Sonata model and year. When budgeting for this repair, you can expect the part itself to be the most significant expense. According to estimates from RepairPal, a new window regulator assembly for a Sonata typically costs between $619 and $727. Knowing this range ahead of time helps you plan accordingly and avoid any surprises when you start shopping for the part.
Where to Source Quality Parts
You can find replacement window regulators at most auto parts stores or through various online retailers. If you’re committed to the DIY route, I highly recommend getting your hands on a repair manual for your Sonata. It will be your best friend for avoiding common mistakes, like breaking the plastic clips that hold the door panel in place. However, sourcing the correct, high-quality part and ensuring it’s installed perfectly can be tricky. If you’re feeling unsure, remember that professional car window regulator repairs are always an option. A trusted technician can guarantee the right part is used and installed correctly, saving you time and potential headaches.
Your Step-by-Step Repair Guide
Alright, you’ve diagnosed the problem and have your tools ready. Now for the hands-on part. This process requires patience and a bit of mechanical skill. While many people successfully complete this repair at home, it involves handling delicate electrical components and the heavy window glass. If you start feeling overwhelmed or aren’t confident you can finish the job without causing more damage, don’t hesitate to call in a professional. Our team handles car window regulator repairs every day and can get it done quickly and correctly.
For the determined DIYer, this guide will walk you through each step. Before you begin, we recommend taking photos at each stage of disassembly. This creates a visual reference that can be a lifesaver when it’s time to put everything back together. Make sure you have a clean, well-lit workspace and a container to keep track of all the screws and clips you remove. Ready? Let’s get that window working again.
How to Safely Remove the Door Panel
First things first, you need to get inside the door. To do this, you’ll have to safely remove the door panel. The panel is typically secured by a few hidden screws—often behind the door handle or armrest—and a series of plastic clips around its perimeter. Use a trim removal tool to gently pry the panel away from the door frame, which helps release the clips without breaking them. Once the clips are loose, lift the panel up and off the door. Be careful not to pull too hard, as there will be wires and cables connected to the back for the window switch, speakers, and door locks.
Test the Electrical Components
With the panel off, you can see the inner workings of the door. Before you start unbolting parts, it’s smart to confirm your diagnosis. A professional mechanic will always check the electrical components first to make sure the problem is mechanical, not electrical. Reconnect the window switch to its wiring harness. With the key in the ignition, press the switch and listen. Can you hear the motor trying to work? If you hear a humming or clicking sound, the motor is getting power, which points to a bad regulator. If you hear nothing, the issue might be the motor or the switch itself.
Replace the Window Regulator
If you’ve confirmed the regulator is the culprit, it’s time for the main event. You’ll need to carefully detach the window glass from the old regulator. Use painter’s tape to secure the glass to the top of the door frame so it doesn’t fall and shatter. Next, remove the old regulator and motor assembly by undoing the bolts that hold it to the door and disconnecting its electrical plug. This can be a bit awkward, as you’ll have to maneuver the assembly out through one of the access holes in the door frame. Take your time to avoid scratching any paint or damaging other components.
Install the New Motor
Now, let’s get the new parts in. If your new regulator didn’t come with a motor attached, you’ll need to bolt the old motor onto the new regulator first. Then, guide the new assembly into the door. Loosely attach the mounting bolts to hold it in place. Before tightening everything down, plug in the new motor’s electrical wire and temporarily reconnect the door’s control panel. Test the motor to make sure it works, which will also help you align the regulator’s mounting bracket with the window glass. Once aligned, carefully lower the glass and secure it to the new regulator.
Put It All Back Together
You’re in the home stretch! With the new regulator and motor installed and the window glass secured, it’s time to reassemble. Tighten all the mounting bolts for the regulator. Before putting the door panel back on, reconnect all the wires for the switch, speaker, and any lights. Give the window one final test—run it all the way up and down to ensure it moves smoothly. Once you’re satisfied, carefully hang the door panel back on the door, align the plastic clips, and press firmly around the edges to snap it into place. Finally, reinstall the screws you removed at the beginning.
Breaking Down the Repair Costs
Let’s talk about money. Figuring out the cost of a car repair can feel a bit like a guessing game, but it doesn’t have to be. When your Hyundai Sonata’s power window acts up, the final bill depends on a few key things: the cost of the parts, the price of labor, and whether you decide to tackle the job yourself or call in a professional. Understanding these factors will help you make a smart decision without any surprises.
We’ll walk through what you can expect to pay for parts, how to read a professional quote, and the pros and cons of a DIY repair versus hiring an expert. We’ll also touch on whether your car insurance might lend a hand. This way, you can get your window working again without breaking the bank.
How Much Do Parts Cost?
The main component you’ll likely need is a new window regulator, and its price can vary. For a Hyundai Sonata, the part itself can cost anywhere from $600 to over $700, depending on your car’s specific year and model. When you factor in labor at a typical repair shop, the total replacement cost often lands between $750 and $920. Keep in mind that these are just averages. The final price can shift based on the supplier and your vehicle’s exact specifications, so it’s always a good idea to confirm the part number before you buy.
What to Expect from a Professional Quote
When you ask for a professional quote, you should receive a clear breakdown of all the charges. This typically includes the cost of the replacement parts and an estimate for labor. However, be aware that initial estimates might not include taxes or other small fees. A trustworthy service will be transparent about all potential costs upfront. To avoid any confusion, always ask for a detailed quote that lists everything. This ensures you know exactly what you’re paying for before any work begins, giving you peace of mind and control over the repair process.
DIY vs. Calling a Pro: A Cost Comparison
Doing the repair yourself can definitely save you money on labor, but it’s a trade-off. You’ll need to buy the parts, have the right tools, and set aside a few hours to get the job done. If you’re comfortable working inside a car door, it can be a rewarding project. On the other hand, hiring a professional for car window regulator repairs saves you time and guarantees the work is done correctly. While some general auto shops might charge between $400 and $600, specialized services are often more affordable and efficient. Calling a pro eliminates the risk of making a mistake that could lead to more expensive problems down the road.
Will Your Insurance Cover It?
This is a common question, and the answer depends entirely on your insurance policy. Most standard policies don’t cover mechanical failures or issues from normal wear and tear, which is usually what causes a power window to stop working. However, if your window was damaged in an accident, break-in, or due to vandalism, your comprehensive coverage would likely apply. The best first step is to review your policy documents or call your insurance agent to clarify what’s covered. If it is a covered event, a good repair service can often help you with the auto glass claims to make the process smoother.
How to Prevent Future Window Problems
After you’ve gone through the trouble of a repair, the last thing you want is a repeat performance. A little preventative care can go a long way in keeping your power windows running smoothly. By paying attention to the little things, like clean window tracks and healthy seals, you can catch minor issues before they turn into major headaches. These simple habits will help extend the life of your window components and ensure they work when you need them to.
A Simple Maintenance Checklist
One of the easiest ways to prevent future problems is to regularly check the rubber seals and weatherstripping around your windows. These seals are your car’s first line of defense against the elements, but they can become brittle and cracked over time. Once a month, give them a quick visual inspection for any signs of wear or tearing. A healthy seal keeps water and debris out of the door panel, protecting the delicate electrical components inside. Addressing damage early can save your window motor and regulator from premature failure.
Keep Window Tracks Clean and Lubricated
Your window moves up and down in a track, and when that track is filled with dirt or grime, it forces the motor to work much harder. If you hear grinding noises or notice the window slowing down, it’s a clear sign the tracks need attention. Take a few minutes to clean them out with a cloth and a gentle cleaner. Afterward, applying a silicone-based lubricant will keep things moving freely. This simple step reduces strain on the motor and can prevent the need for a full car window regulator repair.
When to Get a Professional Inspection
While DIY maintenance is great, it’s also important to know when to call for backup. If you’ve cleaned the tracks and checked the basics but the window is still acting up, it’s time for an expert opinion. Electrical issues, in particular, can be tricky to diagnose without the right tools. Instead of guessing and potentially causing more damage, let a professional take a look. Our team can quickly pinpoint the root cause, and it’s always better to be safe and get a professional opinion than to risk a more complicated repair down the road.
Tips to Make Your Power Windows Last
A few good habits can make a big difference in the longevity of your power windows. First, try not to operate multiple windows at once, as this can put a heavy load on the electrical system. If a fuse blows, don’t just swap it for a new one—try to figure out what caused the overload. And if your window is frozen shut in the winter, avoid forcing it down with the switch. This can easily burn out the motor or break the regulator. Instead, give your car time to warm up and let the ice melt naturally.
Quick Fixes for Common Issues
When your power window starts acting up, it’s easy to feel a little helpless. But before you assume the worst, there are a few things you can check and even temporarily fix yourself. These quick tips can help you diagnose the problem and secure your car until you can get a proper repair. Whether you’re dealing with a window that won’t budge, a slow-moving pane of glass, or some unsettling noises, a little know-how can go a long way. Let’s walk through some of the most common power window headaches and what you can do about them right now.
What to Do When Your Window is Stuck
A window that’s completely stuck is one of the most frustrating power window problems. First, take a moment to assess the situation. If the glass feels loose in the door frame, your immediate goal is to prevent it from falling and shattering. A few strips of strong tape can hold it in place as a temporary measure. If it’s cold outside, the window might simply be frozen shut; give it time to thaw before trying the switch again. More often than not, a stuck window points to a malfunctioning regulator, which is the mechanism that moves the glass. This can cause the window to get stuck in any position, up or down.
How to Speed Up a Slow Window
Is your window moving at a snail’s pace? A slow or hesitant window is often an early warning sign of a failing motor or regulator. You might also hear a faint clicking sound when you press the switch, but the window barely moves. This usually means the motor is trying to work but isn’t getting enough power or the mechanical parts are binding. While you can’t do much to speed it up on the spot, recognizing this symptom early gives you time to schedule a professional repair before the window fails completely, saving you from being stuck with a window that’s wide open during a rainstorm.
Getting Rid of Squeaks and Grinding Noises
Strange noises are your car’s way of telling you something is wrong. Squeaking or grinding sounds when you operate your power window suggest the mechanism is struggling. The grinding could be a sign of a broken regulator, and if it gets worse, the window glass could suddenly drop into the door panel. For minor squeaks, you can sometimes apply a silicone-based lubricant to the window tracks for smoother operation. However, a persistent grinding noise is a clear signal that a component has failed and needs immediate attention from a professional to prevent further damage.
Emergency Fixes to Get Your Window Up
If your window is stuck in the down position, you have a security problem. You need a way to get it closed, even temporarily. First, try starting the car, as the extra voltage can sometimes give a weak motor the push it needs. If that doesn’t work, you can try to raise it by hand. With a friend’s help, press the “up” button on the switch while you both use your palms to push the glass upward from both sides. If you can get it closed, use tape to secure it until you can get a professional inspection. This is just a temporary fix to protect your car’s interior.
Related Articles
- The Ultimate Guide to Automotive Power Window Repair
- Power Window Repair: Your Guide to Cost & Fixes
- Window Power Repair: A Guide to DIY & Costs
Frequently Asked Questions
My window makes a grinding noise but won’t move. What does that mean? A loud grinding or crunching sound is almost always a telltale sign that the window regulator has failed. The regulator is the mechanical track system that lifts and lowers the glass. Those noises usually mean that the cable has snapped or the plastic gears inside have stripped. The motor is likely still trying to work, but the broken regulator can’t move the window, resulting in that awful sound.
Is it cheaper to fix the window myself or hire a professional? Doing the repair yourself will save you money on labor costs, but it’s important to weigh the trade-offs. You’ll need to purchase the correct part and have the right set of tools. The process can also be time-consuming and requires careful handling of the door panel, electrical connections, and the heavy glass. Hiring a professional ensures the job is done correctly and quickly, saving you the potential headache of a mistake that could lead to more expensive issues.
How can I get my window closed if it’s stuck down? If your window is stuck open, you can try an emergency fix to secure your car. Have a friend help you. While one person holds down the “up” button on the window switch, the other person should place their palms on either side of the glass and try to guide it upward evenly. If you can get it closed, use strong packing or duct tape to hold it in place until you can schedule a proper repair.
How long does a professional window regulator repair usually take? For an experienced technician, a window regulator replacement is a fairly routine job. While a general auto shop might need your car for the better part of a day, a specialized service can often complete the entire repair in just a couple of hours. Many mobile services can even come to your location and get it done the same day you call, minimizing any disruption to your schedule.
Will my car insurance cover the cost of this repair? Typically, car insurance does not cover mechanical failures that result from normal wear and tear, which is the usual cause for a broken power window. However, if your window was damaged as a result of an accident, a break-in, or vandalism, your comprehensive coverage would likely apply. The best course of action is to review your specific policy or call your insurance agent to confirm your coverage details.
